IISでのサーバ証明書の移動方法(インポート)
ワイルドカードサーバ証明書を CSR を作成したサーバー以外のサーバーにインストールする場合は、エクスポートされた pfx 形式の証明書をインポートします。
以下の手順で、プライベートキー、サーバー証明書、中間サーバー証明書を含んだ pfx 形式の証明書をインポートしてください。
サーバ証明書のインポート
-
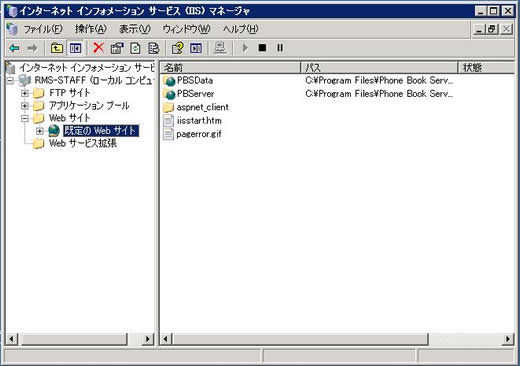
IISマネージャから、インポート対象のWebサイトを選択します。
-
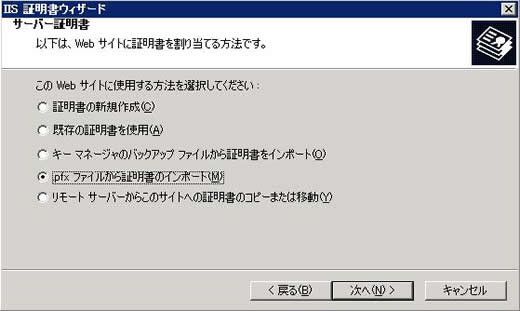
「.pfx ファイルから証明書のインポート(M)」を選択し、「次へ」をクリックします。
-
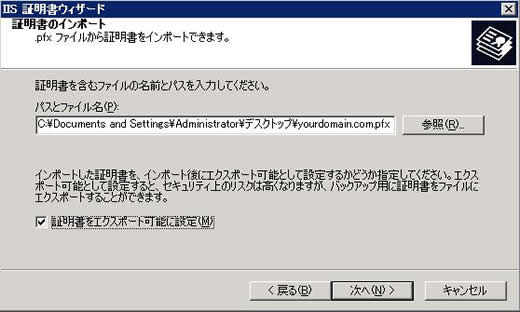
インポートするpsxファイルを選択し、「次へ」ボタンをクリックします。必要に応じ「証明書をエクスポート可能に設定(M)」にチェックを入れてください。
-
証明書エクスポート時に設定したパスワードを入力し、「次へ」ボタンをクリックします。

-
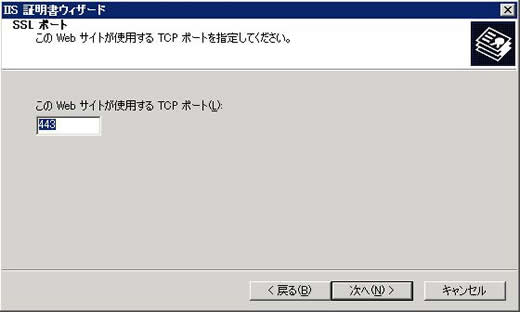
SSLで使用するTCPポートを環境に合わせ変更し、「次へ」ボタンをクリックします。通常では 443 ですが、環境に合わせて変更可能です。
-
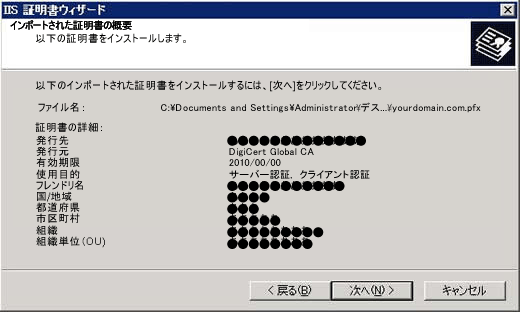
「インポートされた証明書の概要」が表示されますので確認の上、「次へ」ボタンをクリックします。
-
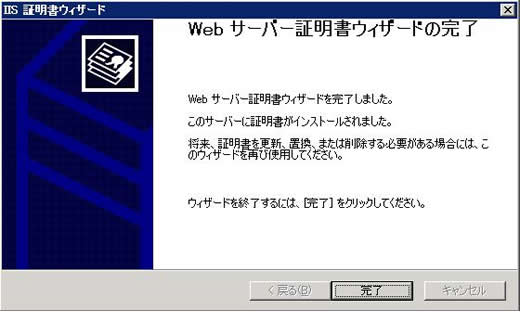
「完了」ボタンをクリックします。